Setting Up Your Exness Account Online:
- Visit the Exness Website: Navigate to www.exness.com in your web browser to access the homepage.
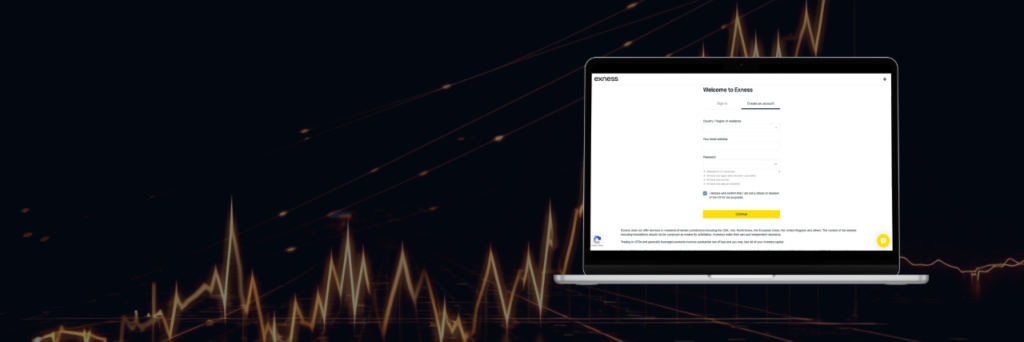
- Registration: Click the ‘Register’ button located typically at the top right corner of the homepage to start the process.
- Enter Your Details: Provide your email address and set a secure password.
- Verify Your Email: Look for a verification email from Exness in your inbox and click the provided link to verify your email.
- Complete Your Profile: Fill in your personal details, including full name, date of birth, and contact information.
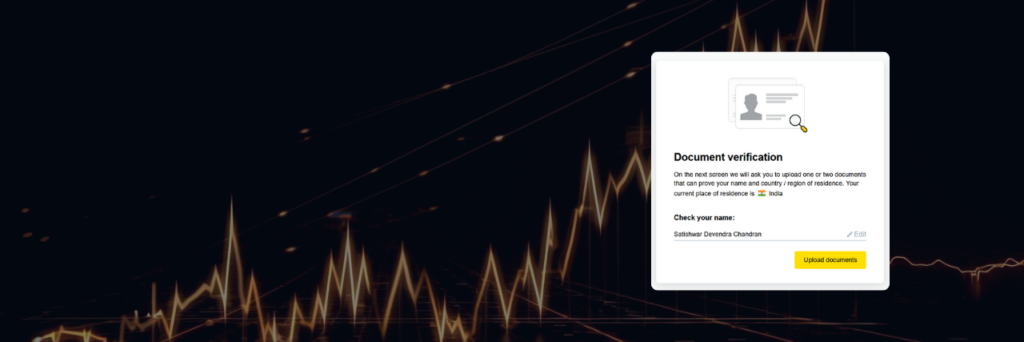
- Identity Verification: Upload clear copies of your government-issued ID and a recent utility bill or bank statement to comply with financial regulations.
- Select Account Type: Choose the account type that suits your trading needs—Standard, Pro, or Cent.
- Fund Your Account: Deposit funds using one of the available payment methods on Exness (not required for demo accounts, which are pre-loaded with virtual funds).
- Start Trading: Begin trading on platforms like MetaTrader 4 or MetaTrader 5.
Easy Setup of Your Exness Account via Mobile App:
- Download the App: Install the Exness Trader app from your device’s app store (Google Play or Apple App Store).
- Sign Up: Open the app, tap ‘Sign Up’, and register using your email and a password.
- Email Verification: Confirm your email by clicking on the verification link sent by Exness.
- Complete Your Profile: Enter your personal details such as your name, date of birth, and address.
- Verify Your Identity: Directly upload photos of your ID and proof of address using your mobile device.
- Choose Your Account Type: Pick an account type based on your trading experience and preferences.
- Deposit Funds: Follow the instructions within the app to deposit funds into your account (this step is optional for demo accounts).
- Start Trading: Use the app’s comprehensive tools to begin trading.
No matter if you choose the website or the mobile app, Exness makes the process intuitive and quick, allowing you to seamlessly transition into the world of trading.
Exness Account Verification Guide
Step 1: Log In
- After registration, access your Exness Personal Area to manage and oversee your account.
Step 2: Initiate Verification
- Navigate to the ‘Profile’ or ‘Account Settings’ section to begin the verification process.
ID Verification
- Document Requirements: Upload a clear, valid photo ID such as your passport, national ID card, or driver’s license.
- Submission: Use the upload tool in the Personal Area or through the Exness app to submit your identification document.
Address Verification
- Document Requirements: Provide a recent proof of residency document, such as a utility bill or bank statement, that displays your name and current address.
- Submission: Upload a scanned copy or a clear photograph of the document via the Personal Area.
Additional Verification (if required)
- You may need to submit extra documents, such as a proof of payment or an additional ID, depending on specific account requirements or regulatory needs.
Await Confirmation
- Exness will review the submitted documents. This review can take anywhere from a few hours to several days. You will receive notification via email or directly in your Personal Area once verification is complete.
Update Your Details
- Keep your personal information up-to-date, especially after any change in your address or other pertinent details, to ensure smooth operations.
Verification Tips:
- Clarity: Ensure all submitted documents are clear and legible.
- Guidelines: Adhere strictly to the specified document requirements and guidelines.
- Formats: Submit documents in accepted file formats and within size limitations.
By following these detailed steps, you can complete your Exness account verification smoothly and securely, paving the way for a robust and successful trading journey.
Selecting a Perfect Account Type
Choosing the right account type at Exness is crucial for aligning your trading strategy, experience level, and financial goals. Here’s an overview to help you select between Standard, Professional, and deciding when to use Demo versus Real accounts.
Standard Accounts
Features:
- Minimum Deposit: None, allowing flexible starting capital.
- Spreads: From 0.3 pips, providing competitive pricing.
- Leverage: Up to 1:2000, offering substantial trading flexibility.
- Commission: No trading commissions, reducing transaction costs.
- Ideal for: Beginners and intermediate traders seeking straightforward trading conditions.
Benefits:
- Accessible for all experience levels with no minimum deposit requirement.
- User-friendly interface ideal for those new to Forex.
- Supports both MT4 and MT5 platforms, catering to varied trading preferences.
Professional Accounts
Features:
- Minimum Deposit: Starts at $200, tailored for serious traders.
- Spreads: As low as 0.0 pips on Raw Spread accounts, perfect for high-volume trading.
- Leverage: Up to 1:2000, suitable for aggressive trading strategies.
- Commission: Variable, based on the account type, with Raw Spread and Zero accounts incurring per trade commissions.
- Ideal for: Skilled traders and professionals requiring advanced functionalities and quick execution for intricate strategies.
Benefits:
- Extremely competitive spreads minimize trading costs on large transaction volumes.
- Market execution without re-quotes, optimal for techniques like scalping and algorithmic trading.
- Offers sophisticated tools and unique features designed for advanced trading levels.
Using Demo and Real Accounts at Exness
Demo Account:
- Purpose: To practice trading in a risk-free setting with virtual funds, mirroring real market conditions.
- Features: Provides access to all trading instruments available to real accounts.
- Ideal for: Beginners to learn the basics and seasoned traders to refine strategies.
Real Account:
- Purpose: Engages real capital for trading, with actual financial gains or losses.
- Features: Involves genuine monetary transactions, affecting financial outcomes directly.
- Ideal for: Traders ready to engage with market risks for potential returns.
How to Choose:
- Skill Level: Beginners should start with a demo account to gain confidence and understanding. Transition to a real account once you are comfortable with trading mechanisms.
- Strategy Testing: Use the demo account to extensively test strategies without financial risk before applying them with real capital.
- Psychological Preparedness: Be aware that trading with real money can be stressful. Ensure you are psychologically ready for the risks before transitioning from a demo.
This structured guide aims to assist you in selecting the most suitable Exness account, tailored to your trading style and objectives, ensuring a well-informed start in your trading journey.
Getting Started with Depositing Funds into Your Exness Account
Depositing funds into your Exness account is a simple and straightforward process. Here’s how you can get started:
- Log into Your Personal Area: Access the Exness website or use the mobile app and enter your login credentials to access your account.
- Navigate to the Deposit Section: Once logged in, go to the ‘Finance’ section and select ‘Deposit’.
- Select Your Preferred Deposit Method: Exness offers a variety of deposit methods, including bank transfers, credit/debit cards, and e-wallets like Skrill and Neteller. Choose the one that best suits your needs.
- Enter Deposit Details: Specify the amount you wish to deposit and fill in any required financial details corresponding to your selected deposit method.
- Confirm and Complete the Transaction: Follow the on-screen prompts to confirm your details. Depending on the deposit method, you may be redirected to a secure payment gateway to finalize the transaction.
- Verify Your Account Balance: After completing the deposit, check your account balance to ensure the funds have been added. The time for funds to appear can vary depending on the deposit method used.
Common Registration Issues and Solutions
Unable to Register an Account:
- Possible Causes: Regional restrictions, incorrect information input during registration, technical issues.
- Solutions: Verify that Exness is available in your region, double-check all entered information for accuracy, or try accessing the site with a different browser or device.
Password Setup Issues:
- Possible Causes: Not meeting password requirements, system errors.
- Solutions: Ensure your password meets Exness’s specified criteria (length, character types). If issues persist, contact support for assistance.
Verification Document Upload Problems:
- Possible Causes: Incorrect file format/size, unclear images.
- Solutions: Check that documents adhere to the required formats (JPEG, PDF) and size limits, ensure clarity and legibility of the documents, and re-upload if necessary.
Login Difficulties:
- Possible Causes: Incorrect credentials, account restrictions or locks.
- Solutions: Verify that you are entering the correct email and password. If you suspect your account is restricted or if you’re experiencing other login issues, reach out to Exness customer support for help.
This guide ensures that you understand the necessary steps and solutions to effectively manage your trading finances with Exness, along with addressing common registration challenges.
Effective Trading Strategies with Exness
- Embrace the Practice Arena: Start your trading journey using Exness demo accounts. This risk-free environment lets you familiarize yourself with the platform and refine your strategies without financial risk.
- Educate Yourself: Take advantage of Exness’s educational offerings like webinars, tutorials, and articles. Building a strong foundation in Forex trading and technical analysis is critical for success.
- Harness Powerful Tools: Utilize advanced trading tools provided by Exness, including technical indicators, detailed charts, and automated trading functionalities on platforms like MT4 and MT5. These tools can greatly enhance your trading effectiveness.
- Implement Risk Management: Managing your risk is essential. Strategies like setting stop-loss orders can minimize potential losses. Be mindful of the amount you’re willing to risk per trade relative to your total capital.
- Stay Up-to-Date: Remain informed about market news and economic events that could impact your trades. Tools like the Exness economic calendar and real-time news feeds on trading platforms are crucial for staying informed.
- Continuously Evaluate and Adjust: Regularly assess and refine your trading strategies. Markets change, and adapting your approach can keep you ahead. Reviewing your performance frequently can help improve and adapt your strategies to evolving market conditions.
General FAQs about Exness Account Registration
1. What documents do I need to set up an Exness account?
To register, you’ll need a government-issued ID (e.g., passport, driver’s license, national ID) for identity verification and a recent document like a utility bill or bank statement (within the last six months) to verify your address.